
Rene’s Process
-

Inspiration
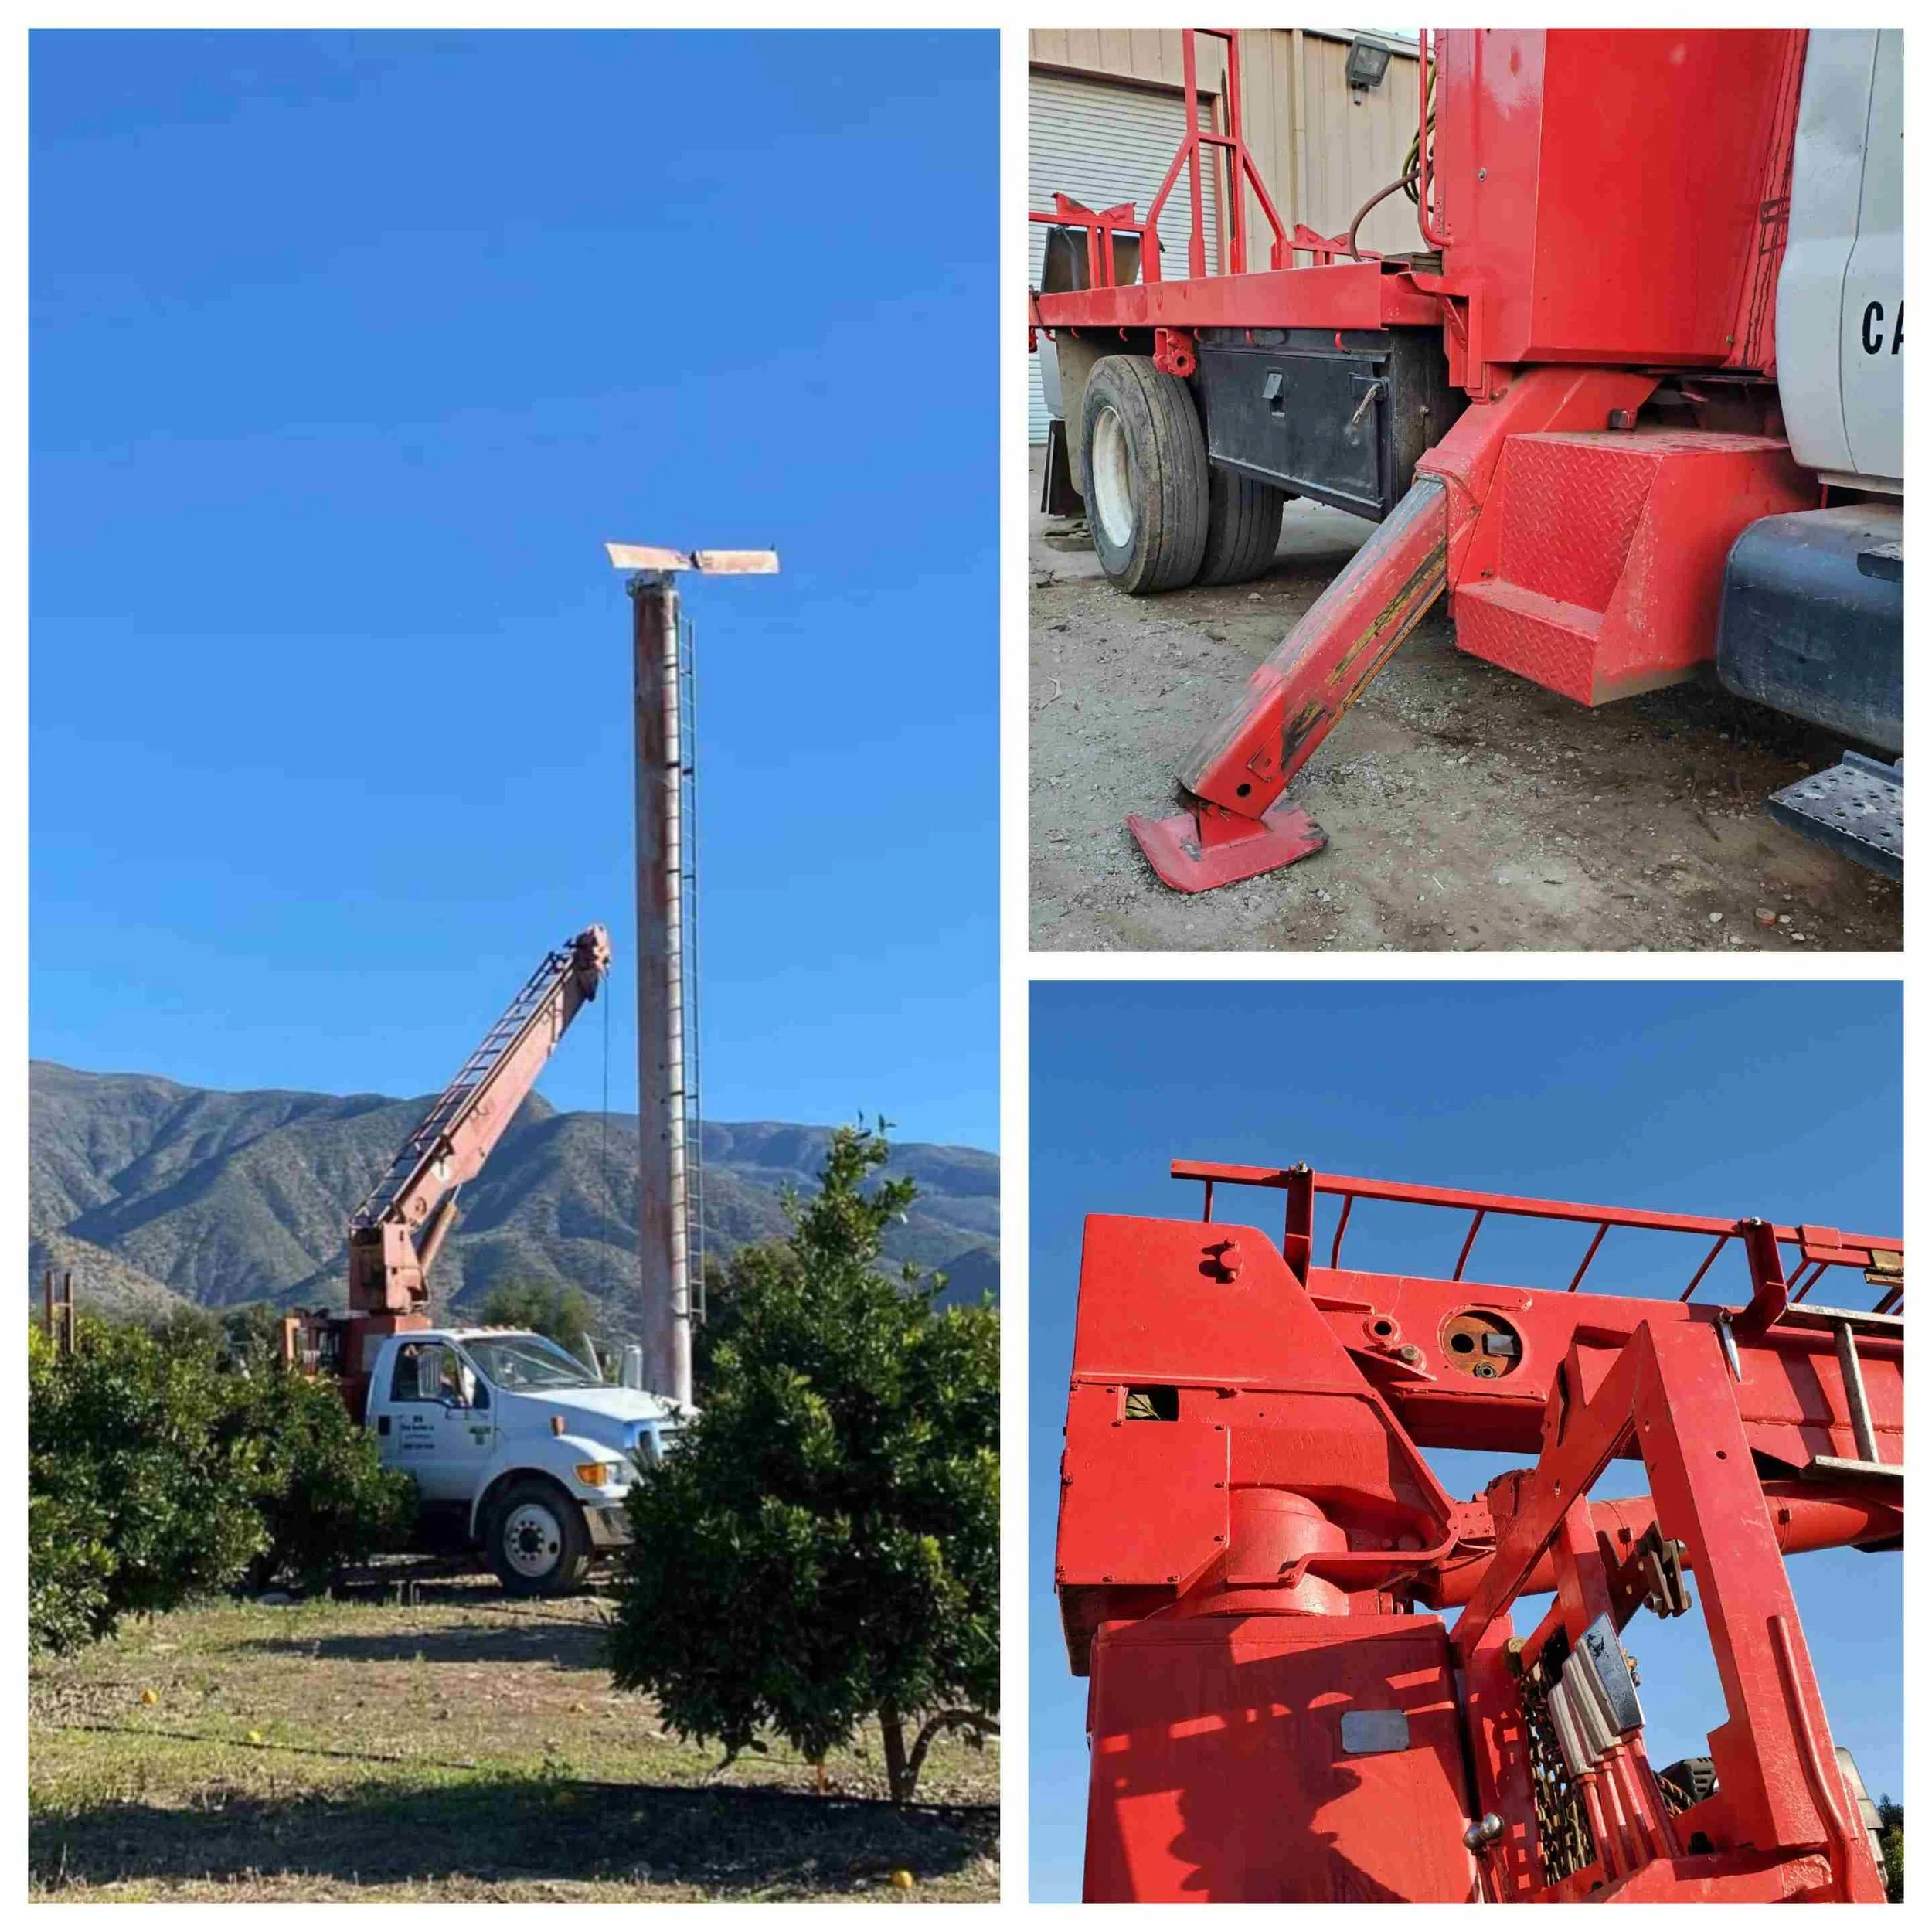
I have no shortage of inspiration for my art. I travel rural Highway 118 and US 101 daily and I am constantly inspired by the landscape: old barns, orchards, crops, produce stands, iconic old buildings, etc.
I also spend time everyday taking care of my cats and other animals and taking long walks, both at the beach and out in the orchards of Somis, CA. The hardest part is actually choosing which sculpture to do next.
-
Photos
Once I decide what I want to do, I will start taking pictures- lots of them- of the of subjects I want to include-- the scenery, structures, animals, kids, etc.
Although I tend to take the majority of my reference photos with my phone, I still constantly run to the local drugstore to print my pictures because I like to be able to flip through them quickly and easily.
-

Composition and Scale Drawings
After I have some good photos, I’ll make some basic simple sketches of how I want things positioned, and then I’ll make some scale drawings. Correct drawings and armatures are a crucial step!
-
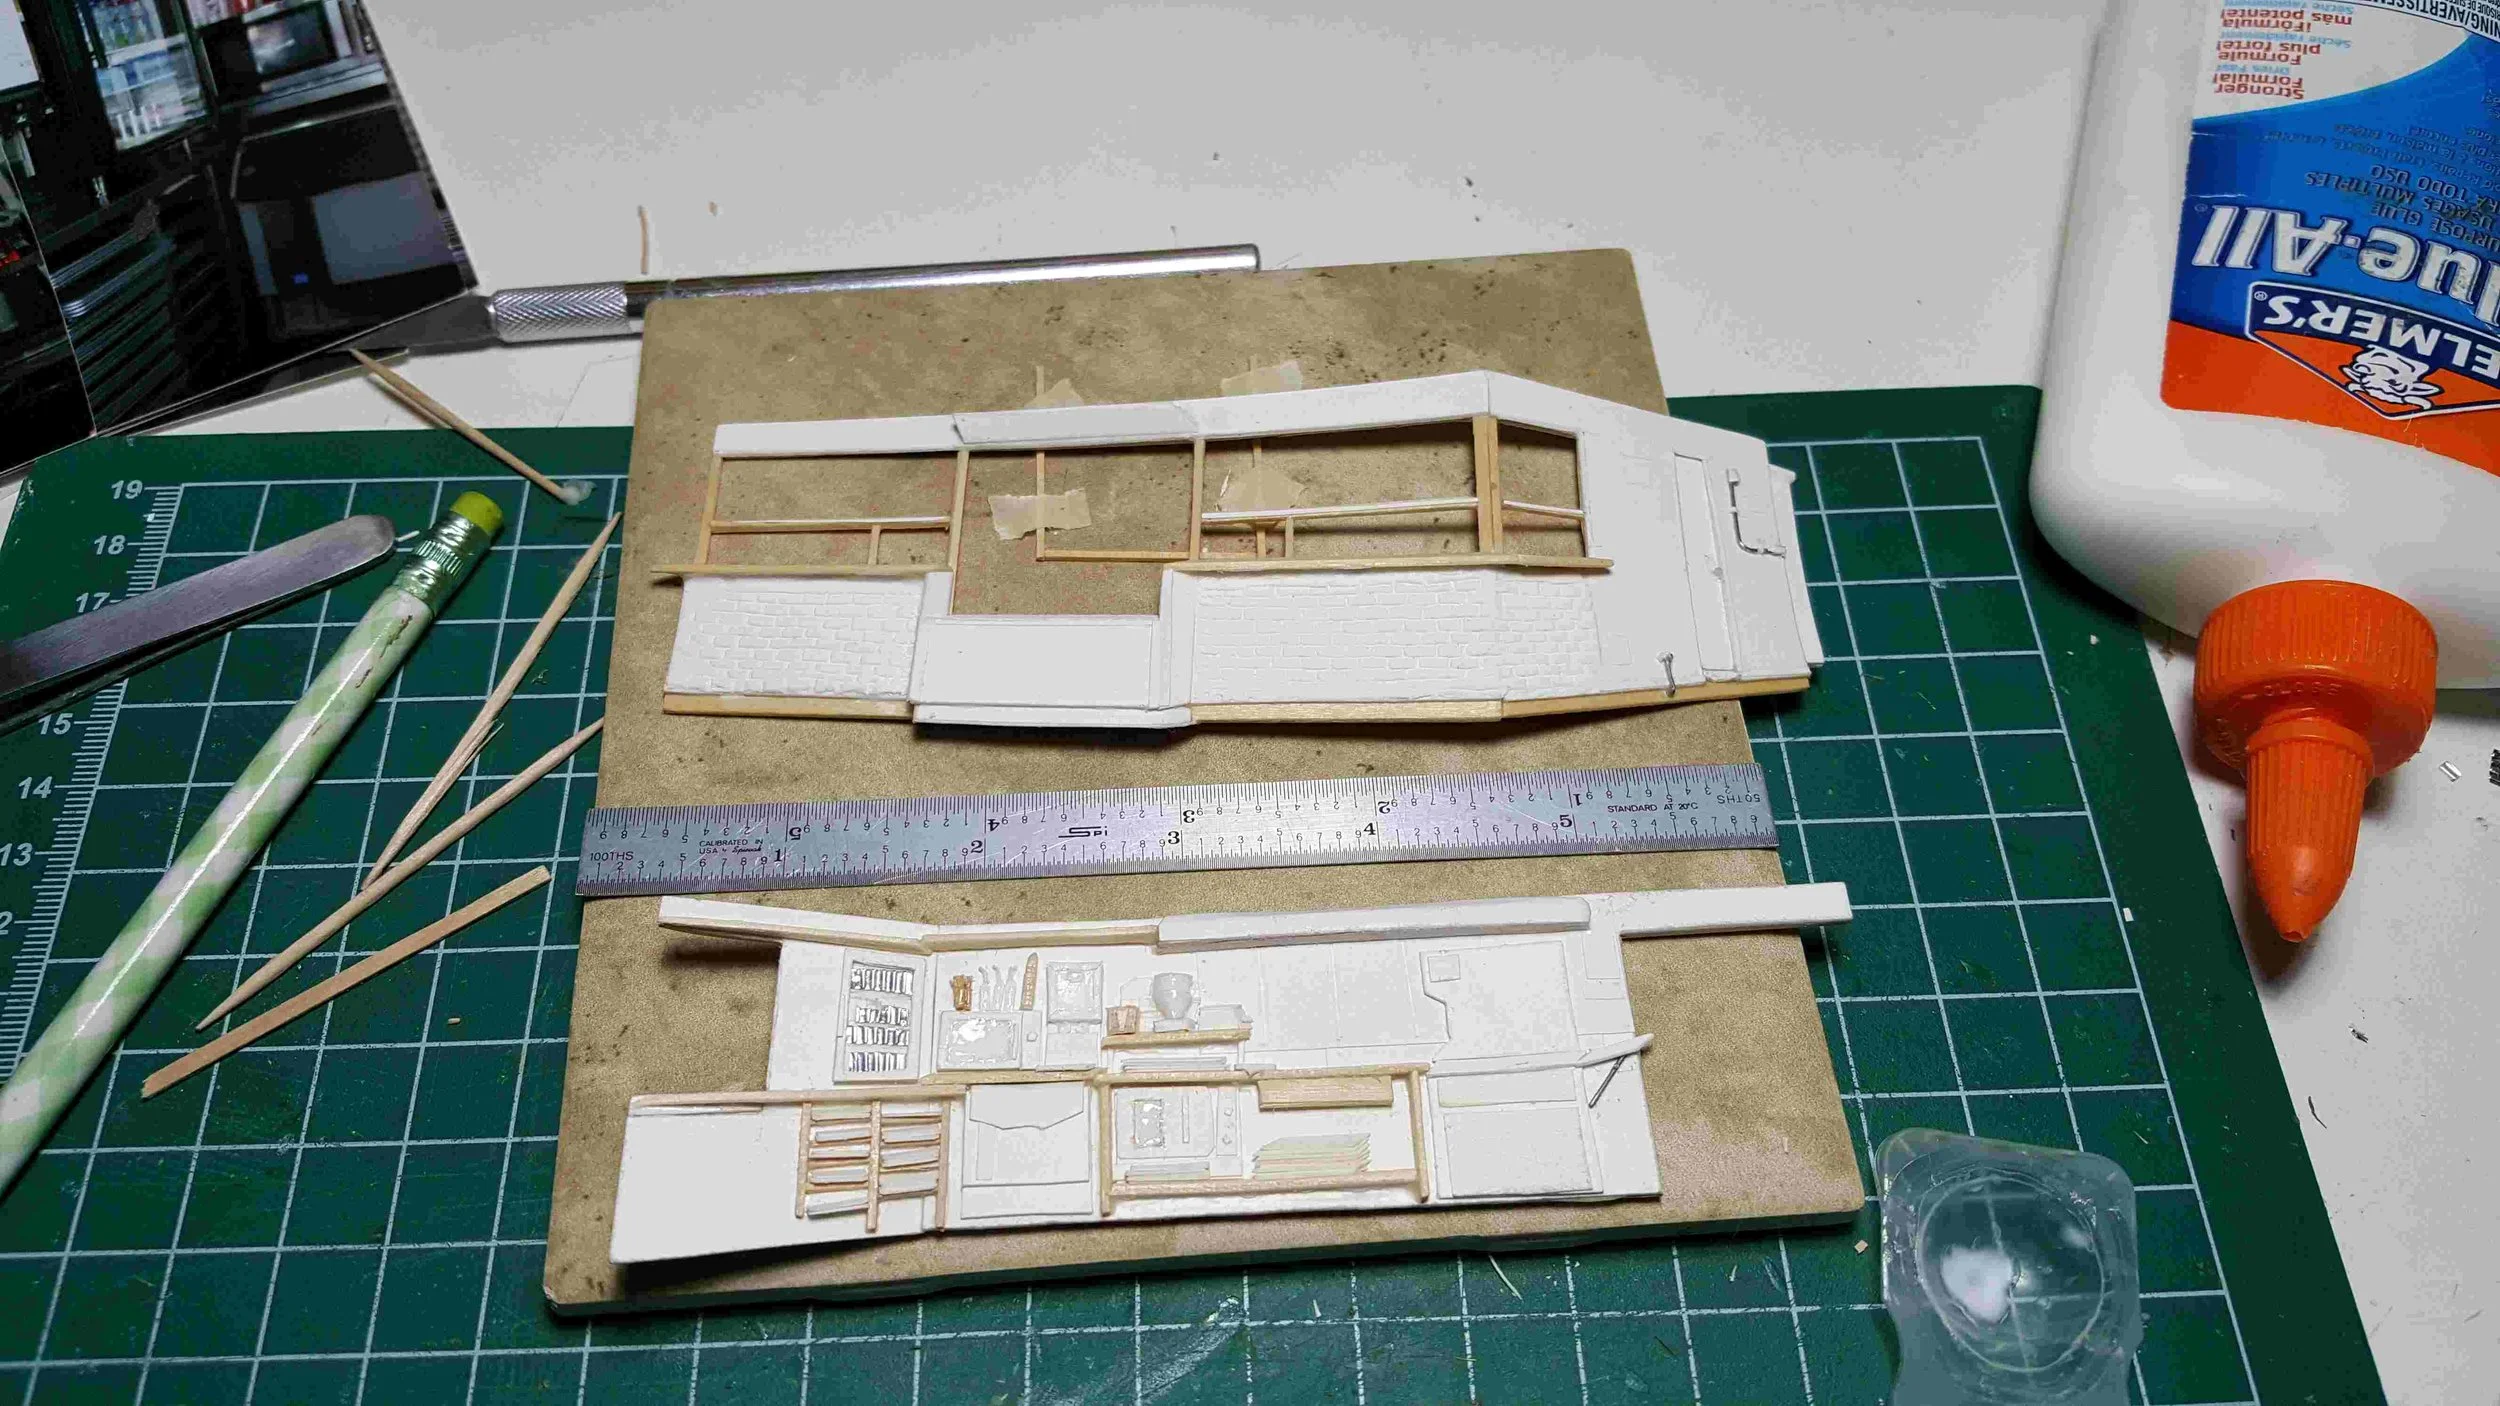
Armatures & Models
I use many different materials for armatures– wire, wood, styrene, etc, and measure each one carefully against my drawings.
To make the models I use pretty much, "anything and everything" including wood, posterboard, clay, wire, etc, Then seal it to prepare for making the molds.
-

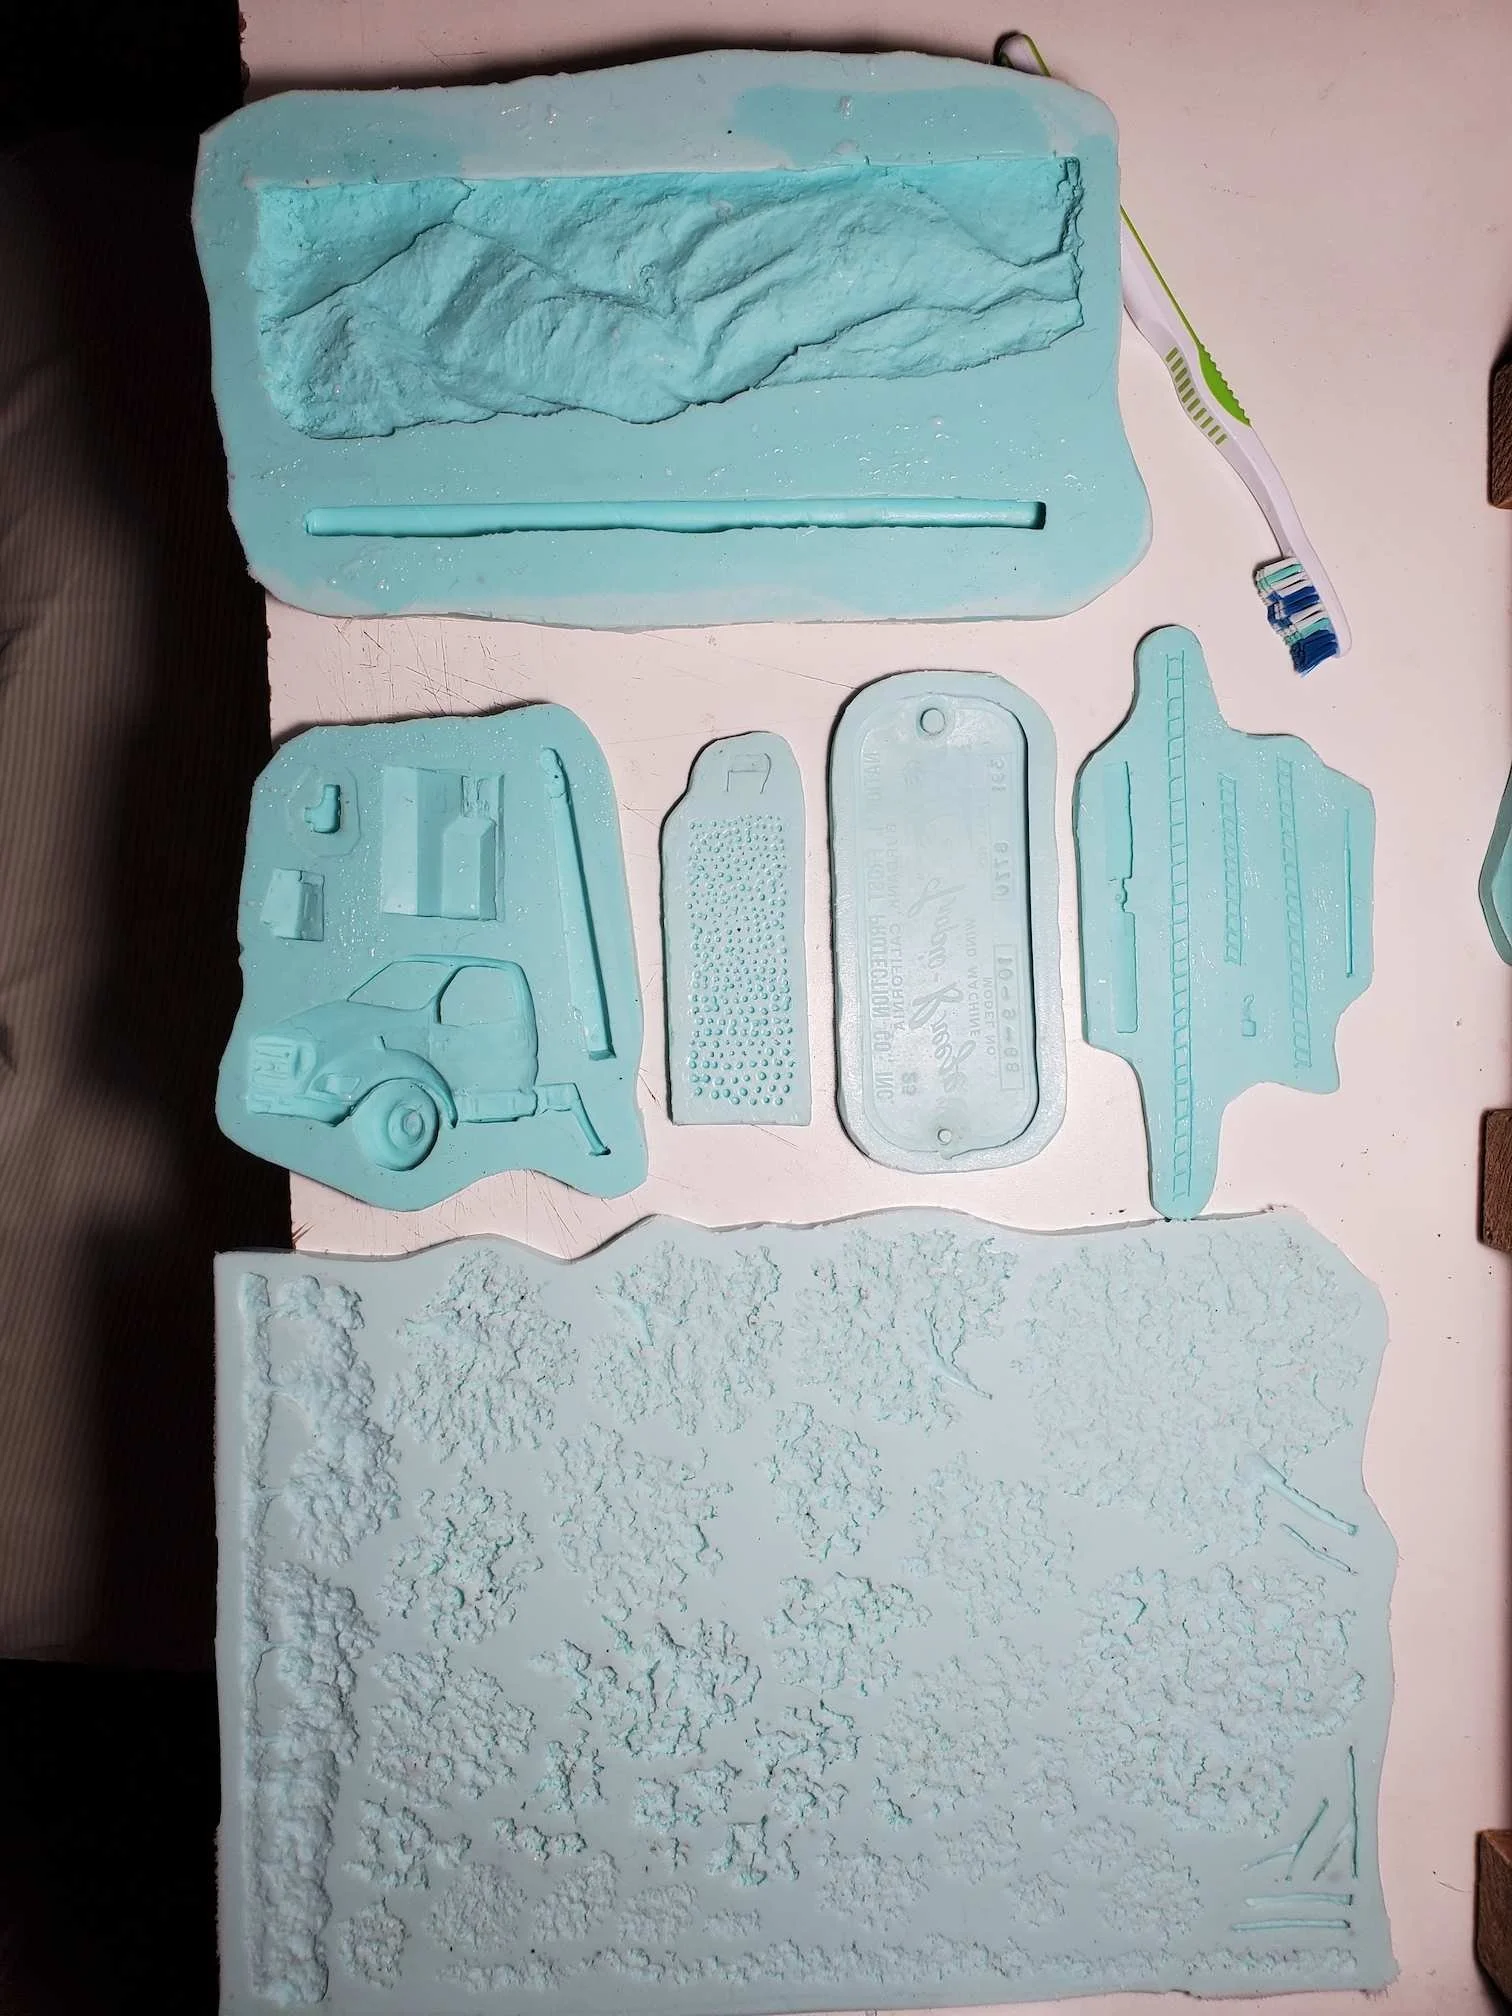
Molds
I feel very fortunate that I am able to make my own molds. I learned to make them when I was doing bronzes, and have adapted that technique slightly to suit the material I now use to cast miniatures. I use a high quality silicone rubber to make the molds.
-
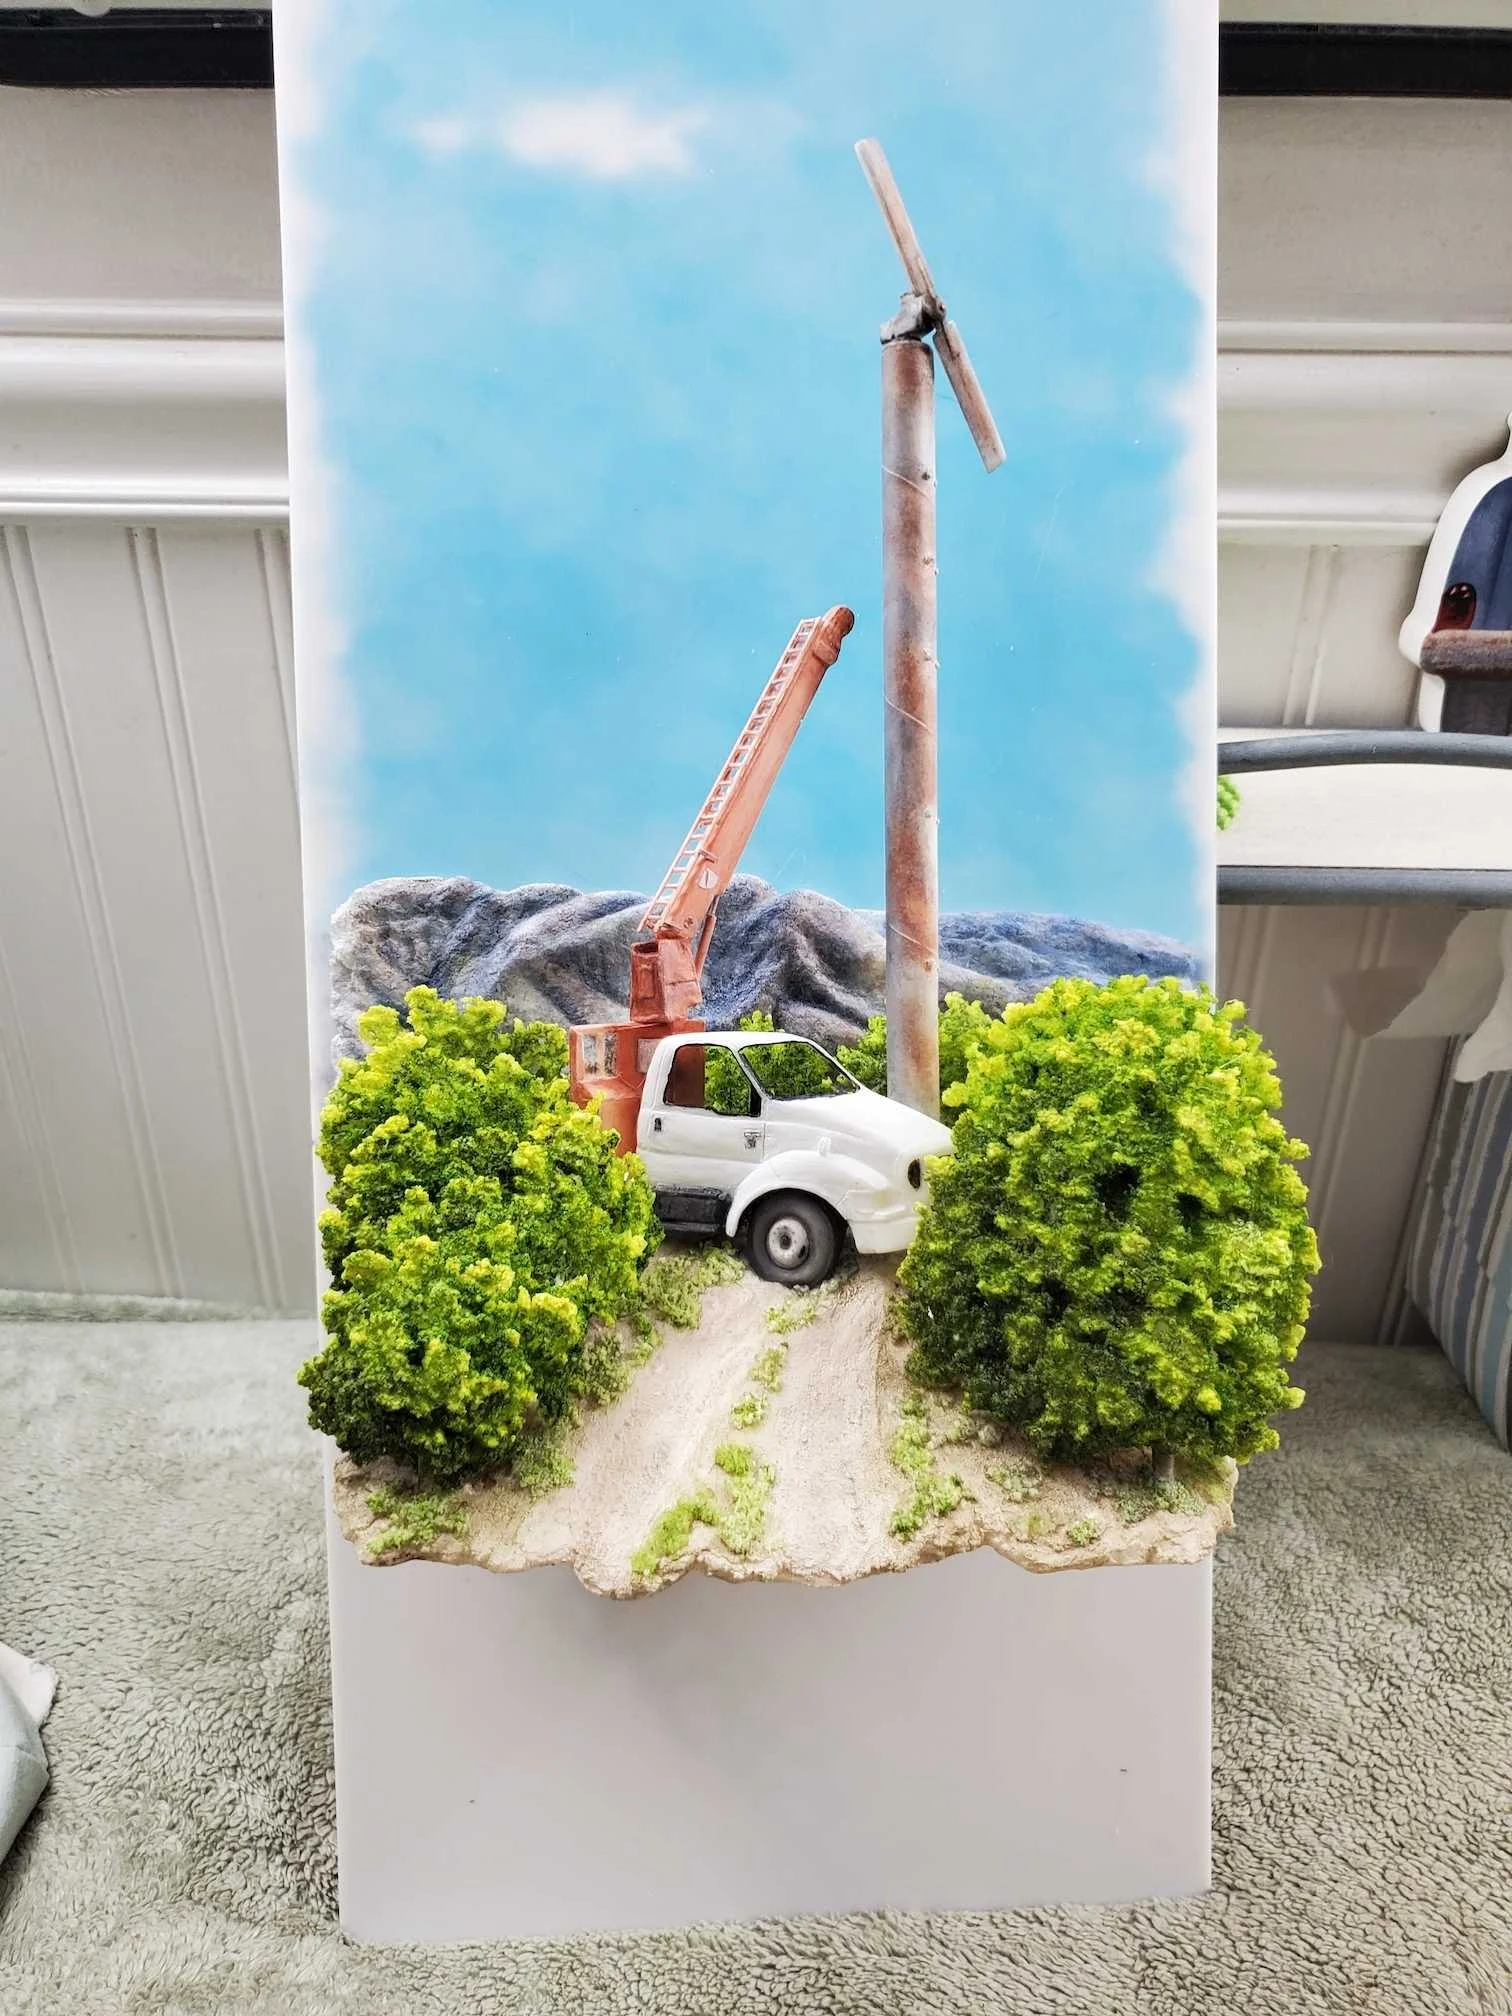
Casting
Once the molds are finished (there are usually several of them for each piece), I remove the original models (which are usually destroyed as they are removed) and cast the parts, reinforcing thin or delicate areas as needed.
I use a very high quality artist's resin for casting which has the translucency, accuracy and strength I like.
-
Touch ups
When the castings have completely cured (usually for several days), I carefully remove them from the molds, inspect them, and touch up any imperfections.
-

Painting
The painting is probably my favorite step in creating my miniature scenes- where it really starts to come alive.
I use a variety of high quality paints to give the piece its character, and then assemble the scene as needed. The piece is then signed, sealed, and allowed to dry thoroughly.
-
Finishing Touches
The miniature scenes are then mounted on a hand painted background and enclosed in a hand made, rustic, UV protected shadow box with a wire hanger. Each piece includes a certificate of authenticity.


